
Install Homebrew
Step by step instructions explaining how to install Homebrew on a Mac, either Mac Intel or Mac M1. Developers use Homebrew to install various software packages on a Mac. You’ll need Xcode Command Line Tools as a prerequisite, but if you don’t have it, Homebrew will install it.
Tip: If you did not use a password to log in to your Mac (that is, if your password is blank), you cannot install Homebrew.
Steps
Here are steps to install Homebrew (details in this complete guide).
- Prepare your Mac.
- Install Homebrew.
- Update the shell configuration (Mac M1 only).
- Install packages.
These instructions are for a terminal running Zsh, the Z shell, on a newer Mac. Older Macs may be running the bash shell and you should upgrade.
Check for Homebrew
Check if Homebrew is installed:
brew
If Homebrew is not installed, you will see:
zsh: command not found: brew
If Homebrew is not installed, there should be no Homebrew files in /usr/local (for macOS Intel) or /opt/homebrew (for Apple Silicon).
Brew install
Homebrew provides an installation script you can download and run with a single command (check that it hasn’t changed at the Homebrew site). This is the easiest way to install Homebrew.
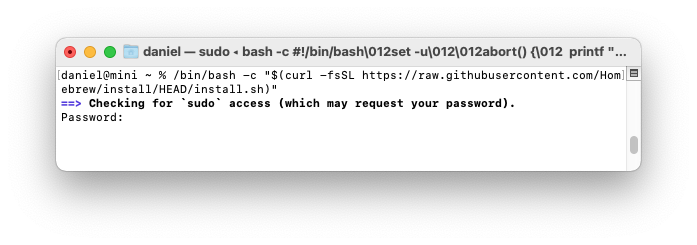
/bin/bash -c "$(curl -fsSL https://raw.githubusercontent.com/Homebrew/install/HEAD/install.sh)"
The Homebrew installation script will ask you to enter your Mac user password. This is the password you used to sign into your Mac.
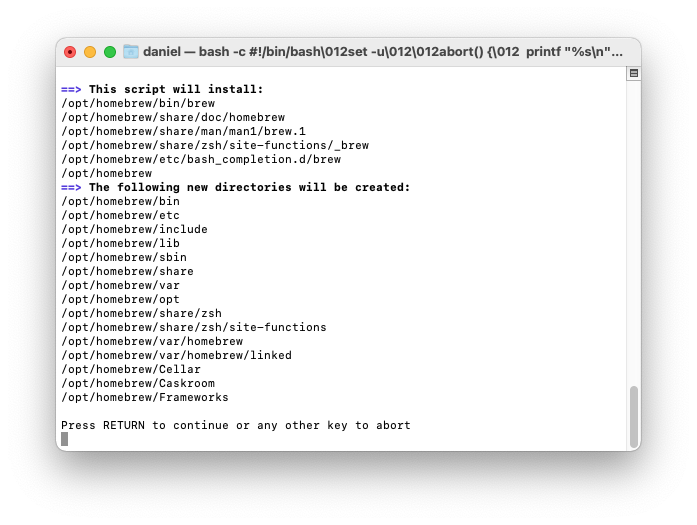
You’ll see a list of files and folders that Homebrew will install.
Option to install XCode Command Line Tools
If you haven’t already installed XCode Command Line Tools, you’ll see a message that “The XCode Command Line Tools will be installed.” Press return to continue when prompted by the Homebrew installation script. It takes one to two minutes to download and install the Command Line Tools.
You’ll see diagnostic and progress messages. Homebrew installation takes 1.5 minutes on a 2021 Mac M1 Mini, with a 100Mbps Internet connection. It’s significantly slower on Mac Intel over a slow Internet connection.
On Mac Intel machines, that’s all you need to do; Homebrew is ready to use. On Mac Intel, Homebrew installs itself into the /usr/local/bin directory, which is already configured for access by the shell with the macOS default $PATH environment variable (the default is set by the /usr/libexec/path_helper command).
Add Homebrew shell configuration
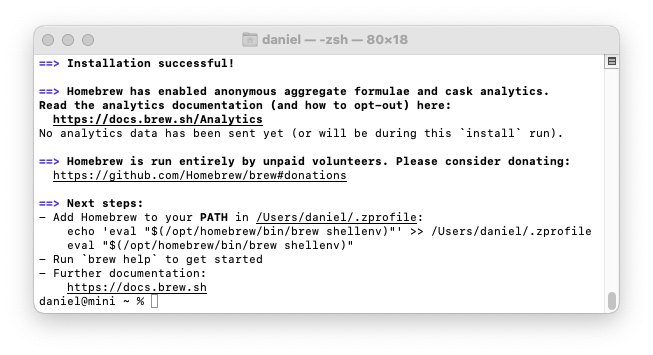
On Apple Silicon machines, there’s one more step. Homebrew files are installed into the /opt/homebrew folder. But the folder is not part of the default $PATH. Follow Homebrew’s advice and create a ~/.zprofile file which contains a command which sets up Homebrew. Homebrew shows instructions at the end of the installation process:
– Add Homebrew to your PATH in ~/.zprofile:
echo 'eval "$(/opt/homebrew/bin/brew shellenv)"' >> ~/.zprofile
eval "$(/opt/homebrew/bin/brew shellenv)"
The Homebrew console output will show your user directory name (the example above contains the Unix ~ tilde shortcut instead).
Alternative shell configuration
Alternatively, you can use a favorite text editor to edit the ~/.zprofile file. Or open ~/.zprofile to use TextEdit to edit the file. You’ll need to add the line eval "$(/opt/homebrew/bin/brew shellenv)" to the file.
Some developers don’t use the ~/.zprofile file, preferring to set the shell configuration in the ~/.zshrc file. That’s okay, but the ~/.zshrc file is evaluated every time a shell is launched. The ~/.zprofile file is only evaluated when you login to your mac user account, so setting the shell with the ~/.zprofile file happens only once at login, saving some overhead.
Shell configuration explanation
Here’s what the brew shellenv command does. It sets environment variables for PATH, MANPATH, INFOPATH, HOMEBREW_PREFIX, HOMEBREW_CELLAR, and HOMEBREW_REPOSITORY. If you don’t use the brew shellenv command, you can achieve the same result by setting environment variables directly in your ~/.zprofile or ~/.zshrc files.
export HOMEBREW_PREFIX="/opt/homebrew";
export HOMEBREW_CELLAR="/opt/homebrew/Cellar";
export HOMEBREW_REPOSITORY="/opt/homebrew";
export PATH="/opt/homebrew/bin:/opt/homebrew/sbin${PATH+:$PATH}";
export MANPATH="/opt/homebrew/share/man${MANPATH+:$MANPATH}:";
export INFOPATH="/opt/homebrew/share/info:${INFOPATH:-}";
The Homebrew site doesn’t explain the purpose of the shell configuration, and while this might seem like unnecessary detail, it is essential and you will need to know how it works if you need to troubleshoot.
Verify Homebrew installation
After you’ve installed Homebrew, check that Homebrew is installed properly.
brew doctor
You should see:
Your system is ready to brew.